

How to Build a Temporary Fence Gate
No temporary fence is complete without a gate, whether it’s to facilitate access for vehicles, people, or both. Events and job sites alike need a balance of security and accessibility, which is why we’ve put together this guide on how to build a temporary fence gate to set you up for success.
We’ll share tips to support you as you attempt to make a temporary fence gate along with some of the different temporary fence gate ideas you have at your disposal.
But the truth is, you’re far better off leaving something like gate installation to a seasoned professional. Even if you feel confident in your abilities, it’s worth saving yourself the time and hassle and focusing your attention on more relevant matters to the event or job.
That’s why we encourage you to reach out to Viking Rental for all your Texas fencing and gate needs. Since 1972 we’ve earned the trust of residents and businesses alike – find out why today!
- Temporary fence gates rental Dallas
- Temporary fence gates rental Austin
- Temporary fence gates rental Houston
- Temporary fence gates rental Fort Worth
Your Temporary Fence Needs a Gate No Matter the Use!
Whether it’s for a construction site, a public event, or a private gathering, a well-constructed gate facilitates convenient access while enhancing security. It allows easy entry and exit for the movement of personnel, equipment, and vehicles.
For construction sites, this means smoother operation as materials and machinery can be transported in and out without a hitch. It also protects valuable equipment and materials from theft.
At events, gates help manage the flow of attendees, making it easier for guests to enter and exit while maintaining an organized and efficient traffic system. Furthermore, it ensures only ticket holders or invited guests gain entry.
The question is, what type of gate does your event or job site need? That’s what we’re here to help you find out. So, let’s get into some of the top temporary fence gate ideas.
Temporary Fence Gate Ideas to Consider
Just as you have many temporary fence options to choose from, there is a wide variety of gate styles you can pick from. Picking the right one is essential for functionality, security, and aesthetic purposes. Here are the most common styles.
Swing Gates
These are a popular choice for their simplicity and effectiveness. They pivot on hinges attached to the gate posts, swinging open and closed like a door.
They’re ideal for creating wide openings to support easy access for both pedestrians and vehicles. This makes them great for just about any setting, from construction sites to event entrances.
From an installation perspective, they’re also very simple to install and operate with minimal maintenance required. The width can easily be adjusted to accommodate different opening sizes.
That being said, they do require more space to swing open than other styles, which means tighter spaces may need something else – like a sliding gate.
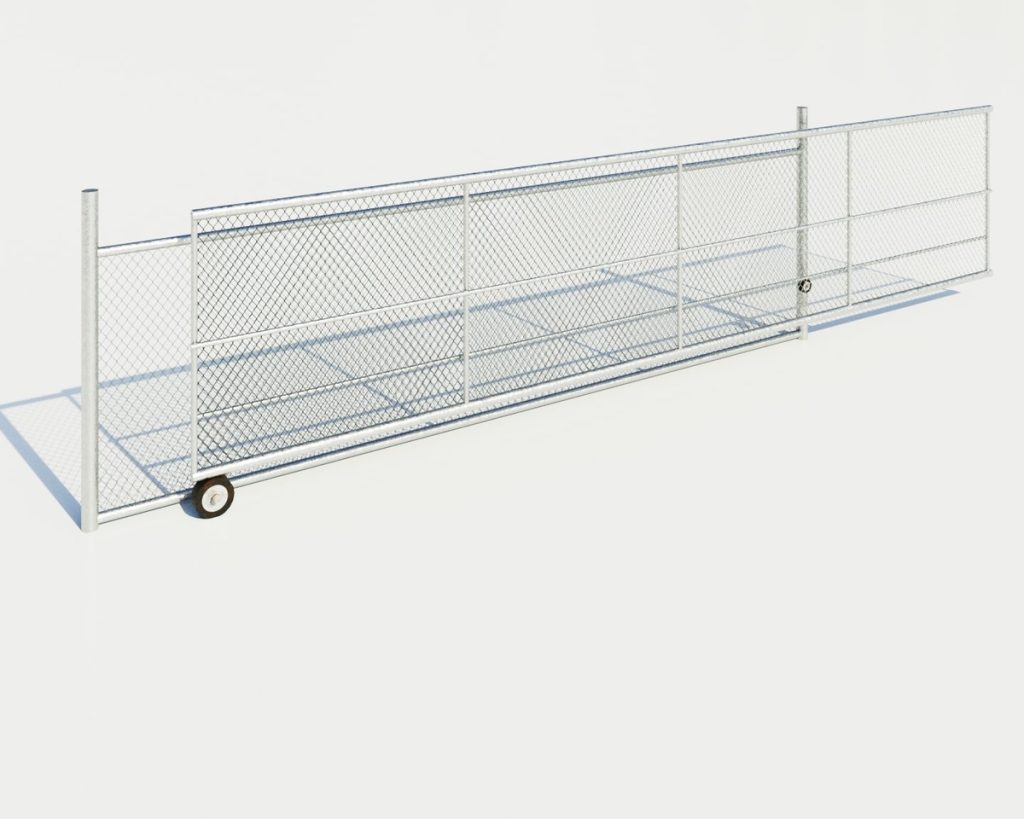
Sliding Gates
As the name suggests, sliding gates move horizontally along a track, making them an excellent option for locations with limited space. They provide a wide opening without the need for additional clearance area for swinging.
They’re also great from a security standpoint as it’s very difficult to force open without unlocking the mechanism. If you have valuable assets stored within the premises you may consider this style. Moreover, they’re incredibly easy to open and close – especially with well-maintained tracks.
Just be aware that slide gates need a flat, even surface for the track. Regular maintenance of the track and rollers is also very important, whereas swing gates are virtually maintenance-free.
Lift-Out Gates
Lift-out gates are specifically designed for temporary use and can be easily removed when not needed. They’re lightweight, portable nature makes them ideal for areas needing occasional access.
Plus, they tend to be less expensive than other styles like swing or slide gates given their simple, lightweight design. The only issue is that they lack security. Just like you can easily move them out of the way to facilitate access, an unauthorized individual can move them, too.
Double Gates
Double gates are a specific type of swing gate consisting of two gate panels that meet in the middle, providing a wider opening. They are perfect for areas that need to accommodate larger vehicles or high volumes of traffic.
They’re very stable in that they balance the weight across two panels, which reduces the strain on hinges. Their flexibility is another noteworthy feature. You can open them partially for pedestrian access or fully for vehicles.
That being said, they do require more space than single-panel gates and need to be securely locked to prevent unauthorized access.
Each of these temporary fence gate ideas has its pros and cons, and you may already be starting to lean toward one style. Most temporary scenarios will align with the balance of easy installation, convenient use, and security provided by swinging gates, though.
When in doubt, reach out. The experts at Viking Rental can help you make the right choice based on your budget and specific needs. In the meantime, let’s talk about how to make a temporary fence gate.
How to Build a Temporary Fence Gate: Step-by-Step Guide
Now that you’ve chosen the optimal gate style for your temporary fencing, it’s time to get to work. Here’s how to build a temporary fence gate, from choosing the ideal gate location to actually navigating the installation process.
For the sake of keeping this conversation concise, we’ll focus the actual installation steps on a swing-style gate. The steps will vary if you choose a sliding gate, which requires the installation of a track. Swing gates are a more temporary style, which is why we’ve chosen this one.
Choosing the Right Gate Location
Building a gate for temporary fence starts with choosing the right location to install the gate. This requires some critical thinking, and best practices will vary depending on whether you’re dealing with a job site or event.
Either way, the main goal is to choose a location that facilitates easy entry and exit. For construction sites, position the gate to allow equipment and vehicles to enter/leave without obstruction. For events, consider placing the gate where it can efficiently manage the flow of attendees and minimize bottlenecks.
The condition of the ground plays a part in location selection, too – it must be stable. Avoid areas with excessive slopes or uneven terrain, as these can complicate installation and operation.
If you have security checkpoints throughout an event, the gate should be placed near these for easy monitoring to prevent unauthorized access.
Materials and Tools Needed
There are many tools and materials necessary for building a gate for temporary fence. These include:
Materials:
- Gate panel (pre-fabricated or custom-built)
- Gate posts (metal or wood)
- Hinges (heavy-duty, rust-resistant)
- Latch (secure and easy to use)
- Bracing material (diagonal braces for added stability)
- Fasteners (screws, bolts, nuts)
- Temporary supports (such as sandbags or weighted stands)
Tools:
- Measuring tape
- Level
- Post hole digger or auger (for ground anchors)
- Shovel (for leveling the ground)
- Drill with appropriate bits
- Wrench set
- Saw (if custom-cutting materials)
- Hammer
- Basic hand tools (screwdrivers, pliers, etc.)
Marking the Gate Area
You know what they say – measure twice, cut once. This applies to marking the installation point for your gate. Determine the width of the gate opening based on your needs. Standard gates for pedestrian access might be around 3-4 feet wide, while vehicle access gates could be 10-12 feet wide or more.
Then, use stakes or spray paint to mark where the gate posts will go. The distance between the marks must match the width of the gate, allowing for hinge and latch space. Use a string line or laser level to ensure the marks are perfectly aligned.
Installing Gate Posts
The first step in actually building a gate for the temporary fence is installing the posts, which will serve as teh foundation for your gate. Here’s an overview:
- Position Posts: Place the gate posts in the marked positions with temporary supports like sandbags or weighted stands to hold the posts upright. Ensure they’re perfectly vertical using a level.
- Anchor Posts: Ground anchors or metal bases can enhance stability. These should be secured tightly to the ground to prevent movement. If you’re using ground anchors, drive them into the ground with a hammer or mallet.
- Brace the Posts: Use temporary bracing to keep posts in position as you secure them, as this will prevent any movement that could misalign the posts.
Attaching Hinges
The hinges are what actually allows the gate to swing open and closed – making this one of the most important steps from a functionality standpoint. It starts with choosing the right hinges.
We mentioned earlier they need to be heavy-duty and rust-resistant, but you also need to make sure they’re capable of supporting the weight of your chosen gate.
You also need to account for the number of hinges necessary depending on the height and weight of the gate – two to three hinges are typically sufficient.
With the gate panel on the ground, mark where the hinges will be attached. They should be evenly spaced along the height of the gate, with one near the top, one near the bottom, and one in the middle if needed. Then, secure the hinges to the gate panel using appropriate fasteners.
Hanging the Gate
With hinges installed securely on the gate you can now install the other side of the hinges on the gate post. You’ll need help from someone (or maybe a few people) to lift the gate panel and align the hinges with the post. The gate should be level and have even gaps on both sides.
Then, attach the hinges to the posts using appropriate fasteners. Ensure the gate is securely attached and can swing freely. Tighten all hinge fasteners, making sure the gate is level.
Test the gate’s swing to ensure it opens and closes smoothly without dragging on the ground. If the gate does not swing properly, make necessary adjustments to the hinges or posts. Small adjustments can make a big difference in the gate’s functionality and save you bigger headaches down the road.
Installing the Latch
The latch is what actually keeps your gate secure, which is where you’ll attach a lock if necessary. Select a study, easy-to-use latch suitable for the gates purpose.
Close the gate and mark where the latch will be installed. The height of the latch will influence accessibility and convenience.
Then, secure the latch to the gate and post using appropriate fasteners. Open and close the gate several times to test the latch. Make sure it catches securely and releases easily.
Finishing Touches
Most of the work associated with how to build a temporary fence gate is done at this point – but you may need to put the finishing touches on your project.
For example, adding diagonal braces can prevent sagging and provide extra stability. These aren’t always necessary, but you may want to install them for high-security areas.
Inspect the gate for any sharp edges or protruding parts that could cause injury. Smooth out any rough areas and cover exposed fasteners. Go over all screws, bolts, and nuts to ensure they are tight and secure.
Finish up by applying a protective coating to prevent rust or weather damage. Paint or sealant can prolong the gate’s life and maintain its appearance. This is only necessary for longer-term temporary fencing solutions.
Why Go Through the Hassle and Labor to Make a Temporary Fence Gate When Viking Rental Can Do It For You?
There you have it – how to make a temporary fence gate! You can see that there’s clearly a lot of work that goes on to bring your gate to life.
So, just like with how to install temporary fencing, you may be better off partnering with the best temporary fence rental provider in your area. If you’re in Texas, that happens to be Viking Rental with more than 50 years of experience and counting. We offer both slide gates and swing gates depending on your budget and needs:
- Swing gates: Single and double panel gates available, ranging from 12-15’ across to 24-30’ across. We also have pedestrian swing gates that measure up to 4’ across. These can be attached at any point along the fence and are our more popular choice.
- Slide gates: These are available in opening sizes between 12-24’ and come in at 8’ high. They’re excellent for tighter spaces and can be enhanced with privacy screens and windscreens.
We’re available to remove all the guesswork of choosing the right style, too. Whichever option you pick, you’re getting the world-class experience you deserve. We handle everything from installation to maintenance to teardown.
But beyond our gate installation services, we can handle all your other temporary fencing needs too! That includes:
- Temporary chain link fence rental Dallas
- Temporary chain link fence rental Austin
- Temporary chain link fence rental Houston
- Temporary chain link fence rental Fort Worth
- Security fence rental Dallas
- Security fence rental Austin
- Security fence rental Houston
- Security fence rental Forth Worth
- Temporary fence panel rental Dallas
- Temporary fence panel rental Austin
- Temporary fence panel rental Houston
- Temporary fence panel rental Fort Worth
So, what are you waiting for? Get in touch with Viking Rental today and find out firsthand what has made us the #1 choice in the Lone Star State since 1972.
Wrapping Up Our Guide to Building a Gate for Temporary Fence
From the top temporary fence gate ideas to actually building a gate for temporary fence, we’ve covered everything you need to know about how to build a temporary fence gate in this guide.
As you can see, there’s a lot that goes into this project – but it’s not something you can take lightly given its role in accessibility, security, and functionality.
Key steps include choosing the right location, gathering appropriate materials, accurately marking the gate area, securely installing posts, attaching hinges, and properly hanging the gate. The only thing left to do now is get to work or get in touch with Viking Rental to handle it for you!
Our blog has more resources on what to use as a temporary fence, temporary fence rental cost, do you need a permit for a temporary fence, DIY temporary fence ideas, temporary chain link fence rental prices, what is a temporary fence, and more.
But as the most trusted provider of temporary fencing solutions across Texas, we’re here to take away all the stress and uncertainty of securing an area, be it a job site or event. Don’t worry about any of the details, leave it all to us so you can focus on more relevant matters. Reach out today!