
Your event is meticulously planned – top-notch entertainment, mouthwatering food, and the buzz of anticipation is thick in the air.
Yet, a lurking thought threatens to throw a wrench in the works: where will your guests use the restroom? A standard lineup of porta-potties isn’t exactly the ambiance you envision, especially when a long day and an open bar are part of the mix.
You long for an elevated experience, something clean, comfortable, and in line with the style of your event.
There’s no denying it – clean, comfortable bathrooms are integral to any well-managed project or special event.
That’s where your mind might race to DIY bathroom trailers. But consider this: DIY bathroom trailers involve complex plumbing, electrical work, and navigating strict building codes. Not to mention the time and hassle of sourcing materials and managing the build itself.
When you need top-notch restroom solutions, consider a seasoned partner that has you covered in all these areas.
Use Cases for Bathroom Trailers
Whether you’re juggling limited space or prioritizing upscale ambiance, a well-appointed bathroom trailer solves logistical challenges. Let’s examine some scenarios where bathroom trailers prove essential:
- Construction Sites: When your crew isn’t trudging long distances for bathroom breaks, they’re on the job. Efficiency paired with improved sanitation results in happy, productive workers. Consider installing a DIY portable hand washing station nearby for increased hygiene, particularly amidst regulations concerning COVID-19 and cleanliness.
- Events (Fests, Concerts, Races): Say goodbye to long, snaking lines for smelly porta-potties. An upscale bathroom trailer complements the ambiance, keeping guests comfortable and the mood festive.
- Home Remodels: Overhauling your bathroom should be exciting, not an ordeal. With an on-site bathroom trailer, you retain both comfort and privacy.
- Disaster Aid: Emergencies call for immediate help. With readily available DIY portable hand washing stations and bathroom trailers, dignity and basic sanitation become immediate, tangible comforts.
Should You Make a DIY Restroom Trailer?
So should you make a DIY restroom trailer? A quick internet search yields endless tutorials and how-tos for the adventurous DIY-er.
However, as glamorous as those final reveals may be, a DIY restroom trailer carries more depth (and complexity) than a weekend Pinterest project. Let’s explore the benefits and the not-so-glamorous truths of going the DIY route.
Benefits of DIY
- Cost Control: Building a smaller bathroom trailer, with basic fixtures, might offer you an upfront budget edge when compared to porta potty rental prices. However, be wary of hidden expenses lurking in every aisle of the hardware store.
- Custom Touches: Do you long for a spa-like atmosphere, funky artwork, or a specific layout? A DIY restroom trailer affords total creative control.
Challenges and Considerations
- Unending To-Do List: This project can easily take weeks or even months to complete. Building your own restroom trailer is a significant commitment. From construction to plumbing and electrical work, there is a lot involved.
- Skill vs. Frustration: If you’re new to carpentry, plumbing, and electrical work, you’re venturing into an intricate learning curve. Mistakes equal expense and potential safety risks.
- Regulations Galore: Many localities have rules governing DIY restroom trailers. Permits, inspections, etc., require time and money to navigate correctly. Don’t become bogged down in red tape and paperwork for your project.
- The Cost Surprise: Materials fluctuate in price, tools or special equipment can quickly break the budget, and miscalculations are common with even seasoned builders. A DIY bathroom trailer can ultimately eat up more of your budget when compared to the affordability of the cost of restroom trailer rental.
- Got a Truck? Even if your bathroom trailer will be a more permanent structure, the transport and potential setup of any bathroom trailer (either rented or DIY-built) should be considered as part of the planning process. Your vehicle must have the power, hitch, and capacity to safely tow if you decide to construct your own trailer.
Why You’re Better Off Partnering With Viking Rentals
Let’s be frank: there’s a distinct difference between “can be done” and “should be done”. When crafting an outstanding event or managing a bustling construction site, Viking Rentals checks every box on your restroom necessity list:
- Stress, Begone! From drop-off to pickup, Viking Rentals handles everything. Your bathroom trailer arrives on time, clean, and ready to connect wherever you need it on site.
- Technical Know-How: Plumbing, wiring, and overall structural integrity – it’s built right because we prioritize both safety and function. We understand the finer details of what goes into providing porta potty vs bathroom trailer options and how each differs.
- Your Vision, Fulfilled: Viking boasts a selection to please everyone. Need a single porta potty? What about a sprawling multi-unit trailer to wow your gala guests? Our team listens and matches your needs perfectly.
- Clean as a Whistle: With professionally maintained restrooms, you can breathe easily. Say goodbye to DIY hassles like sanitizing tanks and cleaning the entire unit.
- Expect the Unexpected: Surprises are fun, restroom malfunctions less so. With Viking, you’re not only getting top-notch equipment but also peace of mind. Should any surprise hiccups occur, our team is here for timely support, keeping your focus where it belongs – on your event.
Steps to Build a DIY Bathroom Trailer
Constructing your own DIY bathroom trailer is nothing short of ambitious. While rewarding, this extensive project demands careful preparation, dedication, and a bit of grit. If you’re ready to put your DIY skills to the test, here’s a breakdown of the major steps involved:
Step 1: Frame the Trailer
A solid foundation is non-negotiable. Opt for sturdy pressure-treated lumber or a durable metal trailer frame.
Consider factors like your ideal bathroom size, the weight of fixtures, and whether you need it to withstand transport. Research trailer design plans for inspiration and to avoid critical structural errors.
Step 2: Install the Floor
Choose high-quality plywood designed for outdoor use, with proper thickness to handle loads and prevent warping due to moisture. Remember to seal the seams thoroughly to ensure a watertight floor for your DIY restroom trailer, making clean-up easy.
Step 3: Build the Walls
Frame the walls with solid studs, allowing adequate space for insulation. Lightweight wall paneling offers ease of installation while ensuring durability.
Ensure your walls can not only withstand moisture but are mold-resistant, an essential point when creating a shower or sink area.
Step 4: Install the Roof
Select a roofing material capable of tackling your local weather conditions, then carefully plan water runoff to keep moisture away from your trailer’s structure.
For long-term protection, metal roofing and proper flashing are ideal, with an additional layer of sealant.
Step 5: Install the Door and Windows
Consider a solid exterior door with secure locking mechanisms. Windows add ventilation and natural light, but they also create vulnerabilities.
Ensure a watertight seal around your windows to prevent leaks, and for privacy, frosted glass could be a worthwhile investment for your DIY restroom trailer.
Step 6: Add Insulation
Don’t skip this step! Properly insulating your walls and roof makes your bathroom space usable year-round, preventing freezing pipes and uncomfortable temperature extremes. Invest in insulation made for use in damp environments to minimize mold.
Step 7: Install the Plumbing System
Unless you possess professional plumbing experience, partnering with a qualified plumber at this stage is wise. A DIY approach to plumbing your project can pose costly risks to the entire trailer.
Plumbing includes tanks, water lines, drainages, and choosing fixtures suited to your space and specific needs.
For larger events, be sure to find out ahead of time the portable hand washing station rental cost if your trailer does not contain sufficient space or the ability to install one or additional hand washing areas.
Step 8: Install the Electrical System
Safety is paramount here. Incorrect wiring poses risks of fire or electrical shock. If you don’t have vast electrical experience, consult a licensed electrician before attempting this part of your DIY bathroom trailer. GFI outlets should be installed on every line within the bathroom.
Step 9: Add the Bathroom Fixtures
At last, the fun part! Select toilets, sinks, faucets, and other fixtures in the right sizes and designs for your trailer space.
While researching a DIY bathroom trailer, explore the types of porta potties available for inspiration regarding options ranging from small sinks to spacious walk-in showers.
Step 10: Decorate Your Bathroom Trailer
With the construction phase complete, personalize your unique space.
Remember, every material from the flooring to the wall coverings must handle moisture in a small contained area. Think bright, inviting colors, practical shelving, and mirrors. Even tiny bathrooms can boast both style and function.
Let’s be realistic – tackling these extensive steps takes time, patience, and the ability to troubleshoot unexpected hurdles. If your construction needs outpace your current skill level, or your timeline doesn’t permit DIY delays, it’s way better just to go the renting route.
Tips for Maintaining Your DIY Restroom Trailer
Your hard work building a DIY restroom trailer isn’t over – keeping it functional and appealing demands regular upkeep. Let’s cover some maintenance musts:
- The Cleaning Routine: A sparkling bathroom trailer wins points on any occasion. Deep clean your bathroom trailer after each use. Proper sanitization helps avoid odors and the growth of unwanted bacteria.
- Watch for Warnings: Be alert for any leaky faucets, slow drains, or signs of moisture around connections. Timely repairs keep a DIY bathroom trailer working its best, preventing the headache of larger issues later on.
- Storage Savvy: If you store your DIY bathroom trailer outdoors, invest in a quality waterproof cover to minimize deterioration. During long periods without use, be sure to properly winterize it for protection against temperature extremes.
- Keep a Toolkit: Basic tools for plumbing and electrical fixes should be on hand with your DIY bathroom trailer. Remember, unexpected malfunctions often crop up during events when calling in help may not be a quick solution.
Save Time and Stress While Ensuring a Better Restroom Experience With Viking Rentals
While taking pride in your DIY creation is natural, let’s be honest – sometimes time, expertise, and stress levels make rentals the superior solution. Here’s where Viking Rentals shines:
- A Much Better Service: From luxury trailers to budget-conscious portable units, we fulfill every event or job site need. Our range of bathroom trailers means you only pay for the features you require, without the hefty investment of building your own.
- Five-Star Reviews: Our unwavering commitment to client satisfaction stands out. Don’t take our word for it – we have thousands of happy customers sharing their stories.
- Texas Proud: As a local company, we understand the unique requirements of Texas weather and outdoor events. Our 50+ years of experience is directly tailored to your specific needs.
- Plans for Every Project: We offer multiple pricing structures to align with your project, including short-term and long-term rental agreements. Concerned about construction site damage? Our damage waiver plan delivers peace of mind. In need of different types of temporary fencing as well? Viking is your one-stop shop for all the rentals your project or event needs!
Which Bathroom Trailer is Best For You?
Viking Rentals has two bathroom trailers to pick from. Let’s help you make a decision
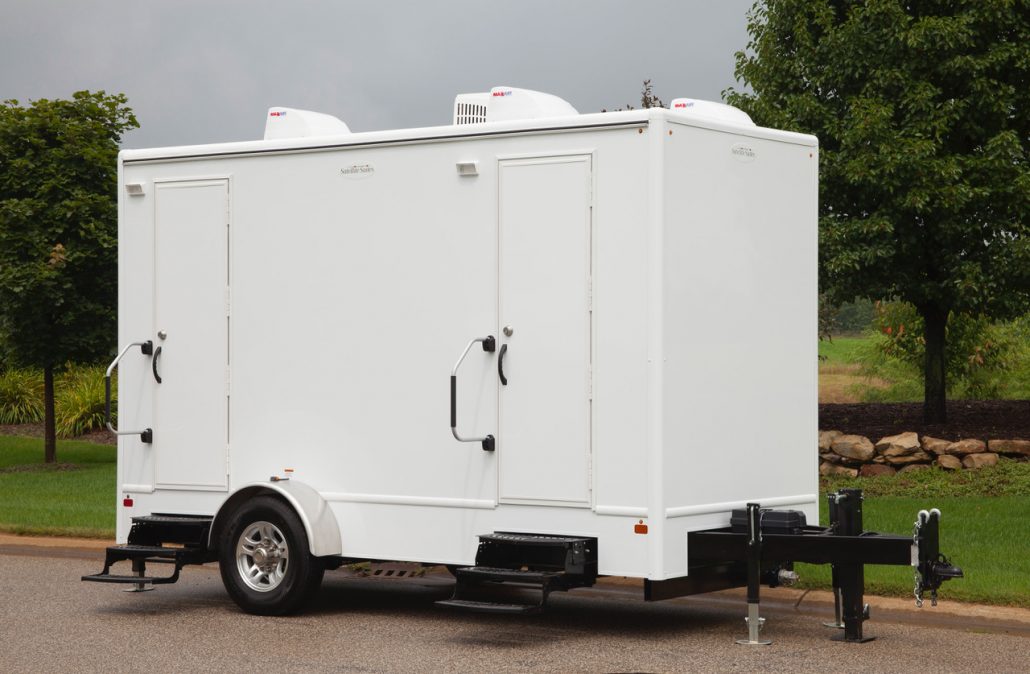
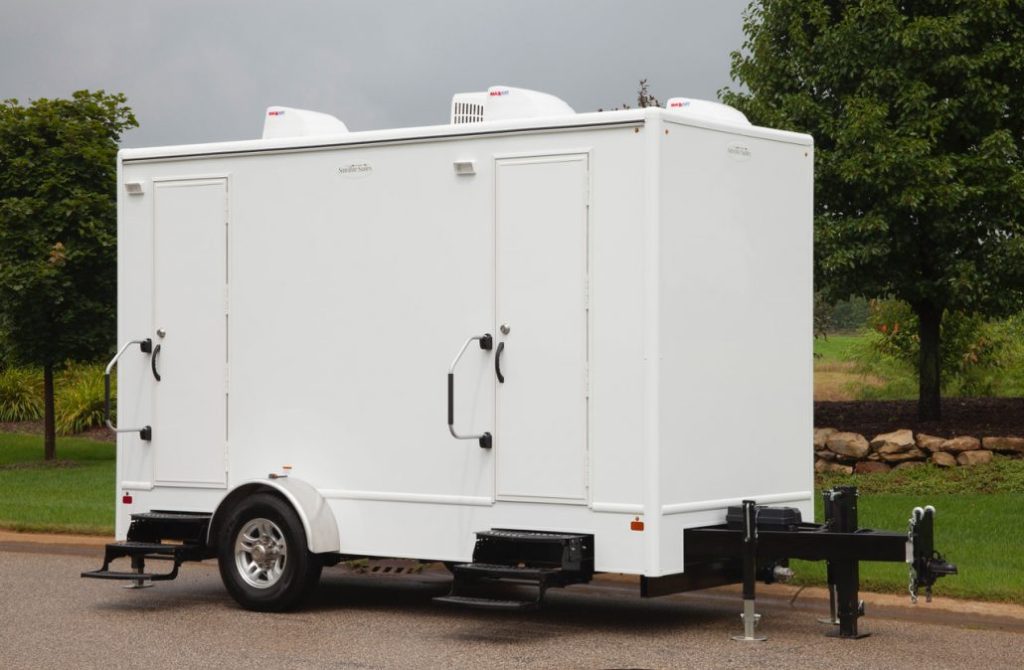
For Smaller Gatherings – The Selfie 2-Unit Restroom Trailer
- Privacy Plus: Two private bathrooms with flushing toilets, sinks, countertops, and plenty of light ensure convenience and dignity for intimate events.
- Goes Anywhere: Setup is a breeze without the need for external hookups – perfect for remote parks or backyard gatherings.
- Comfort Options: Upgrades like AC, heating, or even a sound system turn a necessity into a luxurious touch.
Larger Events & Sites – The Millennium 4-Unit Restroom Trailer
- Spacious & Stylish: Accommodate crowds up to 350 with a home-like atmosphere – an upgrade from those standard porta-potties!
- Easy Maintenance: Moisture-proof design maintains a fresh, upscale experience and simplifies cleanup, a must for those marathon events.
- Built for Texas: Designed to handle local weather demands, ensuring lasting comfort all day long, whatever the season.
Depending on your location, here are some options for you to choose from:
- Bathroom trailer rentals Dallas
- Bathroom trailer rentals Austin
- Bathroom trailer rentals Houston
- Bathroom trailer rentals Fort Worth
Closing Thoughts on Making a DIY Bathroom Trailer
If you’re an experienced builder with a patient streak and a sizable workshop, tackling a DIY bathroom trailer might be your ideal adventure. Knowing where to rent a porta potty and similar equipment is pretty valuable as a backup option.
However, if your vision for a flawless event or a productive workspace prioritizes efficiency and top-notch restrooms, renting a professional-grade Viking Rentals bathroom trailer offers a stress-free solution.
Don’t let a less-than-stellar bathroom situation detract from your next project or special occasion.
Whether you opt for the satisfaction of a DIY build or the time-saving simplicity of renting from a reputable company, clean, comfortable bathrooms make the experience smoother for everyone.
Explore Viking Rentals’ bathroom trailer rentals today and see why we’re Texas’ top choice for outstanding facilities.
We also have other useful DIY articles on our website like our one on DIY temporary fence as well as cost-related subjects such as temporary fence rental cost.Got questions about your options? Looking for a quote? Reach out to us – we’re always happy to chat! We will get back to you within four business hours with a quote.